Choosing the Right Cut of Shank Portion Ham
Selecting the right cut of shank portion ham ensures a flavorful and tender result. Opt for a bone-in, meaty shank for richer texture and juicier meat. Consider fresh or cured options, depending on your preference. Choose a size that fits your serving needs, ensuring ample portions for your gathering. Fresh hams may require longer cooking times, while cured hams offer convenience and a more robust flavor profile. Always check the thickness and marbling for even cooking and enhanced taste.
1.1 Understanding the Shank Portion vs. Butt Portion
The shank portion ham comes from the lower leg of the pig, offering a leaner cut with more connective tissue, making it ideal for slow cooking to achieve tender meat. In contrast, the butt portion, also known as the Boston butt, is from the upper shoulder, typically fattier and more marbled, resulting in a juicier texture when cooked. The shank’s bone-in structure enhances flavor during cooking, while the butt portion is often preferred for slicing due to its higher fat content and easier carving. Understanding these differences helps in selecting the right cut for your desired cooking method and final texture.
1.2 Selecting the Right Size for Your Needs
Choosing the correct size of shank portion ham ensures ample servings without excess. A general rule is to plan for 1/2 to 3/4 pound per person, allowing for generous portions. For smaller gatherings, a 3-4 pound ham suffices, while larger groups may require a 6-10 pound cut; Consider cooking time, as larger hams need more hours to cook thoroughly, and ensure your oven or cooking vessel can accommodate the size comfortably. Proper sizing ensures even cooking and avoids undercooked or overcooked areas, making your meal both enjoyable and stress-free.
Ingredients and Tools Needed
Gather essential ingredients like brown sugar, mustard, honey, and cloves. You’ll need a roasting pan, oven, meat thermometer, knife, and aluminum foil for cooking and glazing.
2.1 Essential Ingredients for Cooking Shank Ham
For a delicious shank ham, gather brown sugar, mustard, honey, and spices like cloves and cinnamon. Stock up on water or broth for moisture and a meat thermometer for accurate cooking. Additional items like aluminum foil and a roasting pan are necessary for even cooking and glazing, ensuring a perfectly caramelized finish and juicy texture throughout the ham.
2.2 Must-Have Kitchen Tools for Preparing and Cooking
Essential tools include a large roasting pan for even cooking and a sharp knife for trimming excess fat. A meat thermometer ensures accurate internal temperature readings, while aluminum foil helps retain moisture. Use a basting brush for glazing and oven mitts for safe handling. A slow cooker or Instant Pot can also be used for alternative cooking methods, enhancing flexibility and convenience during preparation.
Thawing and Preparing the Ham
Thaw the ham safely in the refrigerator or cold water. Trim excess fat and skin for even cooking. Pat dry to ensure proper glaze adhesion and seasoning.
3.1 Safe Thawing Methods for Shank Portion Ham
Thaw the shank portion ham in the refrigerator for 24 hours per 4-5 pounds or submerge in cold water, changing water every 30 minutes. Never thaw at room temperature. Ensure the ham remains in its leak-proof packaging during thawing. Once thawed, cook immediately to prevent bacterial growth. Avoid refreezing thawed ham for food safety and quality preservation.
3.2 Trimming Excess Fat and Skin
Before cooking, trim excess fat and skin from the shank portion ham to enhance flavor and texture. Use a sharp boning knife to carefully remove thick fat layers and tough skin, ensuring not to cut too deeply into the meat. This step prevents excess greasiness and promotes even cooking. Rinse the trimmed ham under cold water, then pat dry with paper towels for optimal glaze adhesion and a balanced flavor profile.
Cooking Methods for Shank Portion Ham
Oven roasting, slow cooking, and smoking are popular methods for shank ham. Each technique offers unique flavors and textures, ensuring a delicious, tender result every time.
4.1 Oven Roasting: A Classic Approach
Preheat your oven to 350°F. Place the shank ham bone-side down in a roasting pan, fat side up. Score the fat in a diamond pattern, then season generously. Roast for 15-20 minutes per pound, or until the internal temperature reaches 140°F. Baste occasionally with pan juices for moisture. Tent with foil if browning too quickly. Glaze during the last 30 minutes for a caramelized crust.
4.2 Slow Cooker Method for Tender Ham
Place the shank ham in a slow cooker, fat side up. Cook on low for 8-10 hours or high for 4-6 hours. Use a meat thermometer to ensure the internal temperature reaches 140°F. Baste occasionally with juices for moisture. During the last 30 minutes, brush with your preferred glaze for a sweet, caramelized finish. This method ensures tender, fall-apart meat with minimal effort.
4.3 Smoking the Ham for a Rich, Smoky Flavor
Preheat your smoker to 225-250°F, using wood like hickory or apple for depth. Place the shank ham flat-side down, ensuring even smoke exposure. Smoke for 4-5 hours, or until the internal temperature reaches 140°F. Baste occasionally with juices or mop sauce. For a glazed finish, brush with your preferred mixture during the last 30 minutes. This method yields a rich, smoky flavor and tender meat.
Glazing the Ham
Preheat your smoker to 225-250°F, using wood like hickory or apple for depth. Place the shank ham flat-side down, ensuring even smoke exposure. Smoke for 4-5 hours, or until the internal temperature reaches 140°F. Baste occasionally with juices or mop sauce. For a glazed finish, brush with your preferred mixture during the last 30 minutes. This method yields a rich, smoky flavor and tender meat.
5.1 Simple Brown Sugar and Mustard Glaze Recipe
Mix 1 cup brown sugar, 2 tablespoons Dijon mustard, and 1 tablespoon honey for a classic glaze. Add 1 teaspoon ground cloves and a pinch of black pepper. Brush the mixture evenly over the ham during the last 30 minutes of cooking. This sweet and tangy glaze caramelizes beautifully, enhancing the ham’s natural flavors and creating a sticky, aromatic crust.
5.2 Timing the Glaze Application for Maximum Flavor
Apply the glaze during the last 30 minutes of cooking to prevent burning and ensure caramelization. Brush the ham evenly, allowing the glaze to set and infuse flavors. For best results, score the surface lightly before glazing to help the mixture adhere. Proper timing enhances the ham’s sweetness and texture, creating a deliciously balanced finish to your dish.
Monitoring Internal Temperature
Monitor the internal temperature to ensure the ham reaches a safe minimum of 165°F, preventing overcooking. Use a meat thermometer for accurate readings, focusing on the thickest part of the ham, avoiding fat or bone. This ensures food safety and maintains a juicy texture, enhancing the overall flavor profile.
6.1 Safe Internal Temperature for Cooked Ham
The safe internal temperature for cooked shank portion ham is 165°F. This ensures the ham is fully cooked and safe to eat. Use a meat thermometer to check the thickest part of the ham, avoiding fat and bone. Properly cooked ham prevents foodborne illness and guarantees a juicy, flavorful result. Always verify the temperature before serving.
6.2 Using a Meat Thermometer Effectively
Insert the meat thermometer into the thickest part of the ham, avoiding fat and bone. Ensure the tip isn’t touching bone or fat for an accurate reading. Proper placement guarantees even cooking and prevents overcooking. Check multiple areas for consistency, especially in larger hams. Accurate temperature monitoring is crucial for achieving tender, flavorful meat without drying it out.
Resting and Carving the Ham
Allow the ham to rest before carving to retain juices and ensure tenderness. Use a sharp knife to slice thinly against the grain for even, flavorful portions.
7.1 Importance of Letting the Ham Rest
Resting the ham after cooking is crucial for retaining its juices and tenderness. As the ham rests, the internal temperature equalizes, preventing the meat from drying out. This step ensures that the flavors are evenly distributed, making the ham more enjoyable when carved. A 15-20 minute rest is ideal before slicing.
7.2 Carving Techniques for Shank Portion Ham
Carving a shank portion ham requires precision to maximize flavor and texture. Use a sharp knife to slice thinly around the bone, ensuring even portions. For easier serving, carve parallel to the bone first, then slice in the opposite direction for bite-sized pieces. This method ensures tender, juicy meat in every slice, enhancing the overall dining experience.
Serving Suggestions
Serve the shank ham with classic sides like mashed potatoes, roasted vegetables, or a fresh salad. Garnish with herbs for a festive presentation, perfect for holidays or special occasions.
8.1 Pairing the Ham with Side Dishes
Enhance your shank ham with traditional sides like garlic mashed potatoes, roasted Brussels sprouts, or sweet potato casserole. A fresh green salad or creamy coleslaw adds a refreshing contrast. Baked beans infused with ham drippings also complement the smoky flavor. Pairing with glazed carrots or pineapple rings offers a sweet and savory balance, creating a well-rounded holiday meal.
8.2 Presentation Tips for a Holiday Meal
Elevate your shank ham’s presentation by arranging it on a decorative platter. Garnish with pineapple slices, cherry halves, and fresh herbs like rosemary or thyme. Drizzle the glaze artfully over the ham and sprinkle with brown sugar. Surround the ham with roasted vegetables or a border of fresh flowers for a visually appealing centerpiece that highlights your culinary effort.
Storing Leftover Ham
Store leftover ham by wrapping it tightly in plastic wrap or aluminum foil and refrigerating. Use within 3-5 days for optimal freshness. For longer storage, freeze in airtight containers or freezer bags, keeping for up to 2 months.
9.1 Proper Storage to Maintain Freshness
Properly storing leftover shank portion ham is crucial for maintaining its freshness and safety. Wrap the ham tightly in plastic wrap or aluminum foil and refrigerate at 40°F (4°C) or below within two hours of cooking. Use within 3-5 days. For longer storage, freeze in airtight containers or freezer bags, ensuring no air exposure to prevent drying. Label and date the containers. Frozen ham keeps well for up to 2 months.
9.2 Creative Ways to Use Leftover Shank Ham
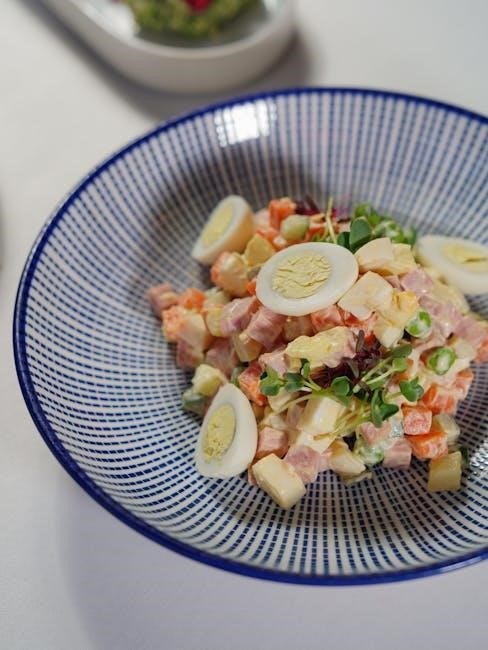
Transform leftover shank ham into delicious meals. Dice it for hearty soups, casseroles, or pasta dishes. Layer slices in sandwiches or wraps for a protein-packed snack. Shred it for tacos or salads. Use it in breakfast dishes like quiche or omelets. Make ham croquettes or add to baked beans for a smoky flavor. These ideas reduce waste and offer variety for future meals.
Common Mistakes to Avoid
Avoid overcooking, which can dry out the ham, and undercooking, which may leave it unsafe. Ensure even heating to prevent inconsistent texture. Use a meat thermometer for accurate internal temperature readings and avoid overcrowding the pan. Proper tenting and monitoring are key to achieving a juicy, evenly cooked ham.
10.1 Overcooking and Undercooking the Ham
Overcooking can make the ham dry and lose its natural flavors, while undercooking may leave it unsafe to eat. Use a meat thermometer to ensure the internal temperature reaches 165°F for fully cooked hams or 145°F for raw hams. Properly tenting the ham during cooking helps retain moisture and prevent overcooking. Monitor closely to avoid these common pitfalls and achieve a perfectly cooked, juicy ham.
10.2 Avoiding Uneven Heating
To prevent uneven heating, ensure the ham is placed fat-side up in the roasting pan and tent with foil during cooking. Rotate the ham halfway through the cooking time to promote even browning and heat distribution. Use a meat thermometer to check internal temperatures in multiple areas, especially around the bone, ensuring consistency throughout. This helps achieve a uniformly cooked, flavorful ham.
Nutritional Information
A 3-ounce serving of cooked shank ham contains approximately 140 calories, 25 grams of protein, 4 grams of fat, and 900mg of sodium. Opt for leaner cuts to reduce fat intake while maintaining rich, savory flavor.
11.1 Caloric and Protein Content
A 3-ounce serving of cooked shank ham typically contains around 140 calories and 25 grams of protein. The caloric content can vary based on fat trimmings and glazing. Leaner cuts may have slightly fewer calories but still offer robust protein levels, making it a satisfying option for meals. Protein content remains consistent, providing essential nutrients for muscle repair and energy.
11.2 Sodium and Fat Content in Shank Ham
A 3-ounce serving of cooked shank ham typically contains approximately 900-1000mg of sodium and 7-9g of fat, with about 2.5g being saturated fat. Sodium levels can vary based on curing processes and added seasonings. Opting for leaner cuts reduces fat content, while glazed hams may have slightly higher sugar content but similar sodium levels. Always check labels for precise nutritional details.
Cooking a shank portion ham requires attention to detail but yields delicious results. Proper preparation, cooking, and glazing ensure a juicy, flavorful dish perfect for any occasion. Remember to monitor temperature, avoid overcooking, and let the ham rest for optimal tenderness. With these tips, you’ll achieve a perfectly cooked ham that impresses your guests every time. Happy cooking!
12.1 Summary of Key Cooking Tips
Cooking a shank portion ham involves preheating your oven to 350°F, placing the ham bone-side down, and using a meat thermometer to ensure an internal temperature of at least 165°F. Avoid overcrowding the pan and consider slow cooking for tender results. Don’t overcook, as it can dry out the meat. Letting the ham rest before carving ensures juiciness and flavor retention.
12.2 Final Thoughts on Perfecting Your Shank Ham
Perfecting your shank ham requires patience and attention to detail. Ensure the ham reaches a safe internal temperature while avoiding overcooking. Letting it rest is crucial for retaining juices. Experiment with glazes and seasonings to enhance flavor. Proper storage ensures leftovers stay fresh. With practice, you’ll achieve a delicious, tender ham that impresses any gathering. Happy cooking!