Replacing fishing rod guides is crucial for maintaining optimal performance and longevity. Guides direct the line‚ ensuring accuracy and control. Damaged or worn-out guides can hinder casting and increase the risk of line breakage. This process involves removing old guides‚ preparing the rod‚ and installing new ones correctly. Proper tools and materials are essential for a successful replacement‚ ensuring smooth functionality and durability. Regular maintenance and inspections can prevent damage‚ while understanding guide types and sizes helps in selecting the right replacements. Replacing guides yourself can save money and extend the life of your fishing rod‚ making it a valuable skill for anglers.
1.1 Importance of Fishing Rod Guides
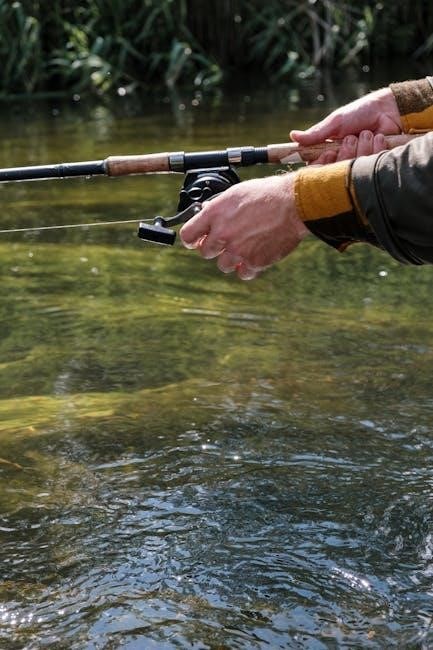
Fishing rod guides are essential for directing the line and ensuring smooth casting. They improve accuracy‚ distance‚ and control‚ reducing line wear and tangles. Properly functioning guides prevent line breakage and enhance the overall fishing experience. They also play a key role in balancing the rod‚ making it more responsive and easier to handle during fishing trips.
1.2 Why Replace Fishing Rod Guides?
Fishing rod guides should be replaced when damaged‚ worn‚ or corroded‚ as compromised guides can lead to line breakage‚ inaccurate casting‚ and reduced sensitivity. Replacing them restores performance‚ ensuring smooth line flow and optimal fishing efficiency. Damaged guides can also cause unnecessary stress on the rod‚ potentially leading to further damage or breakage during use.
Tools and Materials Needed for Replacement
Essential tools include cutting pliers‚ sandpaper‚ and epoxy resin. Recommended materials are new guide frames‚ ceramic inserts‚ and high-quality wrapping thread for secure and durable installation.
2.1 Essential Tools
- Cutting pliers or guide removal tool for safely taking off old guides.
- High-grit sandpaper to smooth the rod surface.
- Epoxy resin for bonding new guides securely.
- A ruler or alignment tool to position guides accurately.
- Hairdryer or heat gun to cure epoxy quickly.
- Wrapping thread and scissors for finishing touches.
- A rod rest or vise to stabilize the rod during work.
2.2 Recommended Materials
For replacing fishing rod guides‚ high-quality materials are essential. Stainless steel or titanium frames are durable and corrosion-resistant‚ suitable for both freshwater and saltwater use. Ceramic or SiC inserts are ideal for smooth line flow and heat resistance. Use epoxy resin for bonding‚ and wrapping thread in matching colors for a professional finish. These materials ensure longevity and optimal performance.
Step-by-Step Guide to Removing Old Guides
Removing old guides requires care to avoid damaging the rod. Use a heat gun or hairdryer to soften epoxy‚ then gently pry the guide off with pliers.
3.1 Preparing the Fishing Rod
Begin by laying the rod on a stable surface‚ ensuring it’s clean and dry. Remove any dirt or debris near the guides to prevent interference. Secure the rod with tape or a vise to keep it steady. Gather essential tools like heat guns‚ pliers‚ and solvents. Inspect the rod for any additional damage or wear. This preparation ensures a smooth and safe guide removal process.
3.2 Safely Removing the Damaged Guide
Apply heat to the damaged guide using a heat gun to soften the epoxy. Gently pry the guide loose with needle-nose pliers‚ working carefully to avoid damaging the rod blank. Once removed‚ scrape off any remaining epoxy residue using a fine-grit sandpaper or a utility knife. Handle the rod with care to prevent further damage during the removal process.
Cleaning and Preparing the Rod for New Guides
Clean the rod thoroughly‚ removing old epoxy and thread residue using sandpaper or a cleaning solvent. Ensure the surface is smooth and free of debris for proper guide adhesion.
4.1 Stripping Old Epoxy and Thread
Strip old epoxy and thread using sandpaper or a solvent to ensure a clean surface. Gently sand the area to remove residue without damaging the rod. This step is crucial for proper adhesion of new guides. Use a fine-grit sandpaper to smooth the surface‚ ensuring all old materials are removed. This prepares the rod for a secure and durable guide installation.
4.2 Smoothing the Surface
After stripping old epoxy and thread‚ smooth the surface using progressively finer grit sandpaper. Start with 120 grit to remove residue‚ then switch to 220 or 240 grit for a polished finish. Use a sanding block to maintain evenness and avoid scratching the rod blank; Clean the area with acetone or mineral spirits to remove dust and ensure proper adhesion for new epoxy. Allow the surface to dry completely before proceeding with guide installation.
Selecting the Right Replacement Guides
Selecting the right guides involves considering size‚ material‚ and type. Titanium and stainless steel frames are durable options‚ while ceramic inserts reduce friction. Match guide size to your rod’s specifications for optimal performance. Choose between spinning‚ casting‚ or fly guides based on your fishing style and needs. Proper selection ensures smooth line flow and enhances casting accuracy.
5.1 Choosing the Correct Size
Choosing the correct guide size ensures optimal performance. Guides should align with the rod’s taper and line weight. Smaller guides near the tip reduce weight‚ while larger ones near the base handle heavier lines. Measure the original guides or consult the manufacturer’s specifications to match size accurately. Proper sizing enhances casting distance and reduces line wear‚ improving overall fishing efficiency and accuracy.
5.2 Understanding Guide Materials
Understanding guide materials is vital for durability and performance. Stainless steel guides are corrosion-resistant and ideal for saltwater. Ceramic guides reduce line wear and friction. Titanium guides offer strength and light weight‚ perfect for freshwater. Choosing the right material depends on fishing conditions and personal preference. High-quality materials ensure longevity and enhance casting accuracy‚ making them a critical choice for rod guide replacement.
5.3 Guide Types and Their Purposes
Fishing rod guides come in various types‚ each serving specific purposes. Single-foot guides are lightweight and ideal for lighter rods‚ while double-foot guides offer stability for heavier lines. Ceramic guides reduce friction and prevent line wear‚ while titanium guides combine strength and corrosion resistance. Choosing the right guide type enhances casting distance‚ accuracy‚ and overall fishing performance‚ catering to different fishing techniques and conditions.
Installing the New Fishing Rod Guides
Installing new guides requires precise alignment‚ securing with epoxy‚ and wrapping for durability. This ensures proper line flow and enhances casting performance and accuracy on the water.
6.1 Aligning and Positioning the Guide
Aligning and positioning the guide accurately is critical for optimal performance. Use a ruler or guide placement tool to ensure proper spacing and alignment with existing guides. Measure carefully to maintain consistent spacing‚ as misalignment can affect casting accuracy and line flow. Secure the guide temporarily with light pressure before applying epoxy for a precise fit. Proper alignment ensures smooth line movement and enhances the rod’s overall functionality.
6.2 Securing the Guide with Epoxy
Apply a thin‚ even layer of epoxy to the guide’s base‚ ensuring full contact with the rod. Gently press the guide into place‚ avoiding air bubbles. Allow the epoxy to cure for 24 hours in a stable environment. Proper adhesion ensures durability and prevents shifting during use. Avoid over-application to maintain a smooth finish and prevent line interference. Epoxy secures the guide firmly‚ enhancing the rod’s performance and longevity.
6.3 Wrapping and Finishing
Once the guide is secured‚ wrap thread tightly around the base‚ ensuring even coverage. Trim excess thread close to the guide using scissors or a razor blade.
Apply a thin layer of epoxy or finishing coat to protect the thread and create a smooth surface. Allow it to dry completely before handling the rod. This step ensures durability and a professional finish‚ preventing thread wear and enhancing the rod’s appearance. Proper wrapping and finishing are essential for long-term performance and reliability.
Testing the Newly Replaced Guides
After installation‚ flex the rod gently to ensure guides are securely fastened and properly aligned. Check for stability and smooth line flow through each guide. Testing confirms the guides’ reliability and performance‚ ensuring optimal casting and fishing efficiency. Proper testing prevents issues during actual use‚ ensuring a flawless fishing experience.
7.1 Checking Alignment and Stability
Ensure guides are perfectly aligned along the rod’s spine for smooth line flow. Gently flex the rod to verify stability and secure placement. Misalignment can cause line tangles or breaks. Proper alignment ensures even stress distribution during casting and fighting fish. Use a straight edge to double-check positioning. This step guarantees reliability and optimal performance‚ preventing potential issues during use.
7;2 Flexing the Rod
Gently flex the fishing rod to test its responsiveness and ensure the new guides are securely attached. This step helps identify any misalignment or instability‚ crucial for optimal performance. Properly seated guides enhance casting accuracy and reduce the risk of line breakage during use. Even distribution of stress during flexing ensures durability and reliability.
Maintenance Tips for Fishing Rod Guides
Gently flex the rod to test responsiveness and ensure guides are securely attached. This identifies any misalignment or instability. Properly seated guides enhance casting accuracy and reduce line breakage risks. Even stress distribution during flexing ensures durability and reliability.
8.1 Regular Cleaning
Regular cleaning is essential to maintain the functionality of fishing rod guides. Use a mild soap solution and a soft cloth to wipe down the guides‚ removing dirt and grime. Rinse thoroughly with fresh water and dry to prevent rust or corrosion. Avoid harsh chemicals‚ as they can damage the materials. Cleaning ensures smooth line movement and prevents wear. Consistency is key for longevity.
8.2 Inspecting for Damage
Inspecting fishing rod guides regularly is vital to identify damage early. Look for cracks‚ rust‚ or misaligned frames. Check for worn-out inserts or loose fittings. After each use‚ especially in harsh conditions‚ examine the guides thoroughly. Neglecting inspections can lead to costly repairs or rod failure. Regular checks ensure optimal performance and prevent unexpected issues during fishing trips‚ saving time and effort in the long run.

Common Mistakes to Avoid
9.1 Incorrect Guide Sizing
Using improperly sized guides can lead to poor line control‚ casting issues‚ and increased wear on the rod; Always match the guide size to the rod’s specifications to ensure optimal performance and durability. Incorrect sizing can cause line tangles‚ uneven stress‚ and reduced accuracy‚ ultimately affecting the rod’s longevity and fishing efficiency.
Using guides that are too small or large can disrupt line flow and casting accuracy. Incorrect sizing may cause uneven stress‚ leading to rod damage or poor performance. Always ensure guides match the rod’s specifications for optimal functionality and longevity. Proper sizing ensures smooth line transition‚ preventing tangles and maintaining consistent fishing efficiency.
9.2 Improper Epoxy Application
Improperly applying epoxy can lead to weak guide attachment‚ reducing durability. Using too much or too little epoxy can cause uneven bonding or residue buildup. Mixing components incorrectly or applying in extreme temperatures may weaken the bond. Always follow manufacturer instructions for mixing ratios and drying times to ensure a strong‚ lasting hold. Proper application is key to avoiding costly repairs.

Cost Considerations
Replacing fishing rod guides involves costs for materials and labor. Quality guides and epoxy can range from $20 to $100‚ while professional installation adds $50 to $150. Comparing replacement costs to buying a new rod helps determine the most cost-effective option for anglers.
10.1 Material Costs
Material costs for replacing fishing rod guides vary depending on quality and brand. Guides typically range from $10 to $50‚ while epoxy and wrapping thread add $10 to $30. High-end materials‚ like titanium frames‚ can increase costs up to $100. However‚ these expenses are often a fraction of the price of a new rod‚ making replacement economical for anglers.
10.2 Labor Costs
Labor costs for replacing fishing rod guides depend on whether you hire a professional or opt for a DIY approach. Professional rod builders typically charge $20 to $50 per guide‚ depending on complexity and expertise. For a full rod replacement‚ labor costs can range from $100 to $200. DIY projects eliminate labor costs but require time and skill‚ making them a cost-effective option for experienced anglers.
10.3 Value of Replacement vs. New Rod
Replacing fishing rod guides is often more cost-effective than buying a new rod‚ especially for high-quality rods. Materials for replacement typically cost between $20 and $50‚ while a new rod can range from $100 to $500 or more. However‚ if the rod is outdated or heavily damaged‚ purchasing a new one might be more practical. Consider the rod’s condition‚ performance needs‚ and sentimental value before deciding.
Replacing fishing rod guides is a cost-effective way to restore performance and extend the life of your rod. With proper tools and techniques‚ anglers can achieve professional results.
11.1 Benefits of Proper Guide Replacement
Proper guide replacement enhances casting accuracy‚ reduces line breakage risk‚ and protects the rod from further damage. It revives the rod’s original feel‚ ensuring smooth operation and longevity. By restoring functionality‚ anglers can enjoy improved performance and reliability‚ making the effort and cost of replacement worthwhile. This maintenance also extends the rod’s lifespan‚ providing long-term value and satisfaction for fishing enthusiasts.
11.2 Final Tips for Longevity
To ensure long-lasting performance‚ store your rod in a protective case to prevent scratches and dings. Avoid exposing it to extreme temperatures‚ which can damage materials. Regularly clean the guides and rod surface to remove dirt and chemicals. Handle the rod gently during use and transportation to avoid accidental damage. Proper care extends the life of your fishing rod and its guides.